
Managing Your Documents
Whether you’re an English major or an Engineering major, it’s likely that you’ll need to use a word processor to submit assignments. These assignments often have page formatting requirements that you’ll need to be prepared for and there isn’t just one way to format your text-based assignments.
Creating a Document
Your first step is to pick your word processor of choice. You’re free to use whichever processor you prefer, but in this chapter our examples will come from Microsoft Word. It’s free to use through Microsoft 365 and is easily editable on the go through OneDrive.
Creating a Document Through OneDrive on your iPad
- Download the OneDrive app directly from Self Service. The app will make you sign into with your Ohio State credentials
- Tap the plus icon at the top right corner of the screen
- Select the type of document you want to create (Word Document or PowerPoint Presentation)

Creating a Document Through OneDrive on a Desktop or Laptop Computer
- Go to OneDrive’s website and sign in using your Ohio State credentials
- Click the New button at the top left of the screen. You’ll have the option to create a Word Document, Excel sheet, PowerPoint presentation or OneNote note

Formatting your Document
Professors at Ohio State have various requirements for formatting documents. To avoid losing points or risking your professor not accepting your submission, follow the below suggestions.
Style Guides
There are many styles to choose from when formatting your document such as MLA, APA and Chicago style. A style will impact your document’s page format. Check your assignment for the required styles to follow. If you don’t find a required style in the assignment, check your syllabus. If the syllabus doesn’t have style information, contact your instructor.
Before you submit your assignment, double check the following formatting options in comparison to your style guide’s specification:
Note: the following instructions are specific to Microsoft Word on the iPad. The location of some of these settings may appear in a different place depending on your device and operating system.
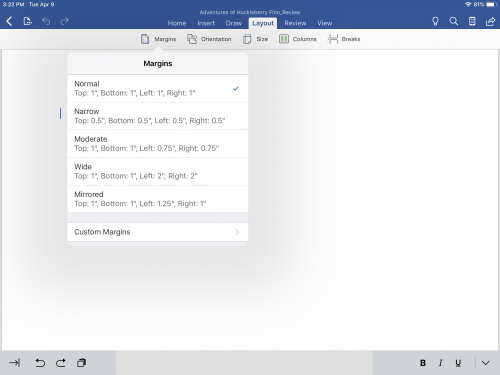
Margins
A margin is the room between the edge of the page and your text, and style guides often have margin size specifications. To edit your margins:
- Open a new Word document in OneDrive or open a document you’ve already created
- Tap on the Layout ribbon along the top menu icons
- Tap on the Margins option (the first one on the left)
- Select one of the Margin options to make changes

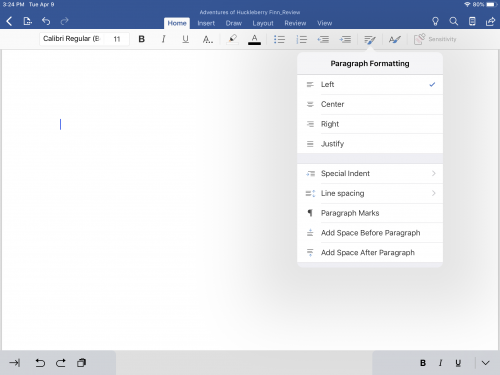
Line Spacing
You may need to change the line spacing of your text depending on the requirements of your style, or per your instructor’s specifications. To edit line spacing:
- Open a new Word document in OneDrive or open one you’ve already created
- Tap on the Home ribbon along the top menu
- Tap the Paragraph Formatting icon (the one the second from the right)
- Select Line Spacing in the menu to make changes

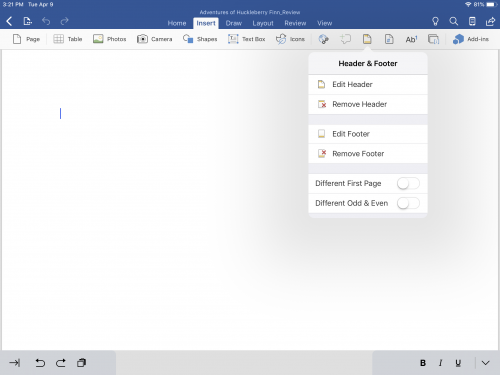
Headers and Footers
You may need to put page numbers, the title of your document or your name in the header or footer. To edit the header or footer:
- Tap on the Insert tab along the top menu
- Tap on the Header & Footer icon, which is the fifth icon from the right
- Tap the Header & Footer icon to open options for editing, removing, and changing settings for the header and footer

Page Breaks
If your document requires separation between sections, page breaks are a must. Your document will automatically jump to the next page wherever you place the page break. They'll also ensure your formatting is consistent across devices and word processors. To add page breaks:
- Open a new Word Document in OneDrive or edit one you’ve already created
- Tap on the Layout tab along the top menu
- Tap “Breaks” to open the menu
- Select the first option, labeled “Page,” to insert a page break


Pro tip: To make sure you didn’t forget any page breaks, tap on the Paragraph Formatting icon within the Home tab, and select “Paragraph Marks” from the menu. With Paragraph Marks turned on, you’ll see the paragraph symbol (¶) each time you’ve hit enter/return, and you’ll see “Page break” with a horizontal line across the page will appear when you’ve used a page break in your document.

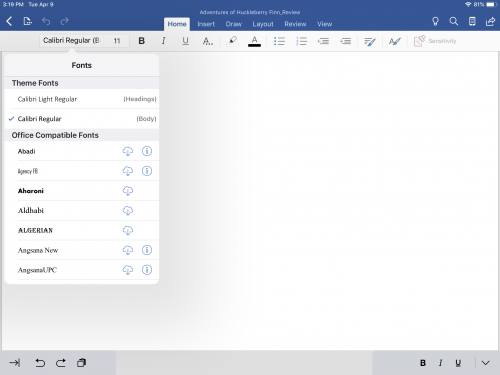
Fonts
Calibri is the default font in Word, but some writing styles may require Times New Roman or another font. To change the font on a document:
- Open a new Word document or edit text you’ve already written by highlighting it
- Tap “Home” along the top menu
- Tap on the left-most text box in the “Home” tab to choose a new font

Sharing your Documents
You can share your documents directly to other apps, share them with other Apple devices through Airdrop on the iPad or email them to whoever you choose. This can help keep your data in multiple locations by ensuring your documents exist across multiple apps. Sharing your documents across apps help keep your data safe in the event your device malfunctions. These options also allow you to easily share your work with others in group settings.
Sharing in Files
Open a document in the Files app. Next, tap on the share icon at the top right corner of the screen. You can then slide along the selection of apps in the pop-up menu to see all the various methods of sharing your file.

Sharing in OneDrive
From top to bottom: Open a file in OneDrive. Next, tap the three-dot menu at the top right corner of the iPad. Then, tap “Open in Another App”. You can slide among the existing options to share your file through multiple apps on your device.


Organizing your Documents
Keeping class notes, personal documents, and other files organized can become difficult after multiple semesters. Thankfully, OneDrive and the Files app all allow you to create folders to keep your files organized to your liking. On all of these apps, you will have the option to drag and drop documents into these folders and create new documents within the folders.
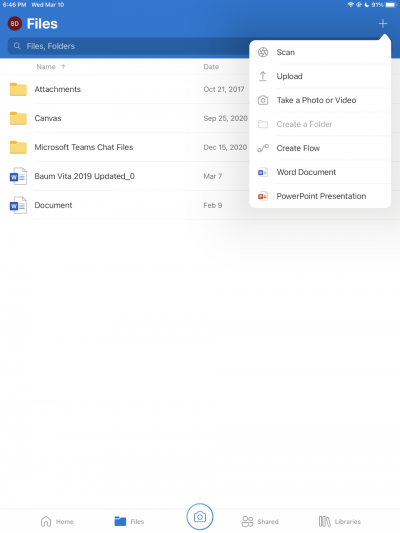
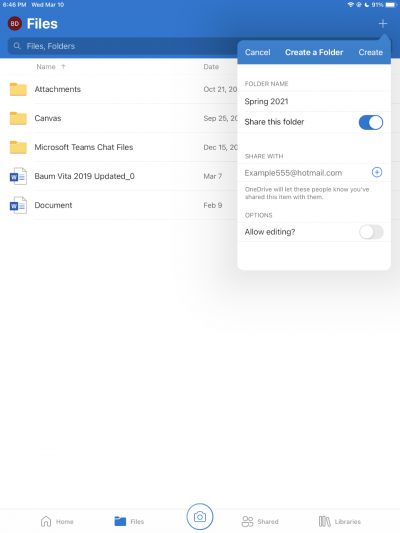
Using OneDrive
First, tap the plus icon. Then tap the “Create a New Folder” icon (left image). Next, a pop-up will appear and you will have the option to name and share your new folder (right image).
Using Files
From top to bottom: First hold down your finger on an empty space near the documents until the black menu appears. Next, click “New Folder.” A new folder will appear, and you will have the option to type a name for your new folder.

