Outlook
Use Microsoft Outlook to check your university email.
Whether you love it or hate it, quickly accessing your email on a regular basis is important for all students. It’s best to use the Microsoft Outlook app to check your school email and to manage your school calendar.
Signing In
The Microsoft Outlook app was automatically downloaded to each Digital Flagship iPad. If you want to use it on your phone, you can download the app directly from your mobile app store.
How to Sign In to the Outlook App
- Enter your school email address. As a student you should use your name.#@buckeyemail.osu.edu email address
- Select "Add Account"
- Sign in with your Ohio State credentials
- Authenticate with BuckeyePass and Duo
- When asked if you would like to add another account, choose "Maybe Later"
- Decide if you want to enable notifications or not. If you choose to enable the notifications, you might need to allow notifications for Outlook within the Settings app
Outlook Features
Use the Focused and Other Tabs
Outlook sorts your emails into two different sections by default: Focused and Other. Focused is where most of your emails will go and Other is where non-personal emails such as newsletters and promotions end up. This feature is designed to sort most of your emails to Focused and keep the rest of them in Other until you’re ready to read them. If you don’t like that feature, you can turn it off. Here's how:
- Open Outlook on your iPad
- Tap on your initials or avatar at the top left of the screen
- Tap on the gear icon at the bottom left of the screen to open Settings
- Turn off Focused Inbox in the Mail section (you might have to scroll)
Add Another Email Account to Outlook
Have more than one email account to keep track of and want to manage all your emails in one place? Outlook provides you the option to add multiple email accounts to the app and switch between inboxes.
- Tap to open the Outlook app on your iPad
- Tap on your initials or avatar in the top left corner of the screen
- Tap the new circular icon that has a message icon and blue plus sign in the top left corner of the screen that is just your initials or avatar
- Click “Add Email Account,” “Add Shared Mailbox” or “Create New Account” to set up receiving emails for multiple accounts in your Outlook app
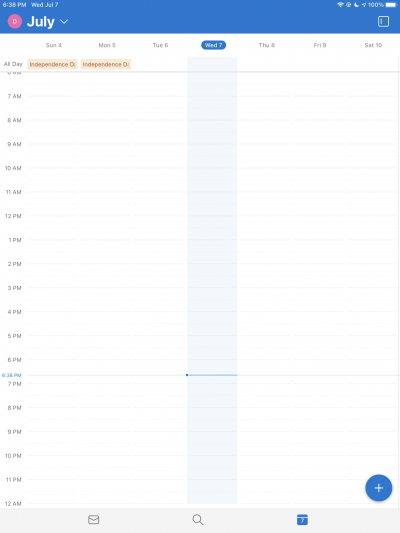
Stay Organized with the Calendar
Access the calendar from the calendar icon on the bottom right of the screen. Use the calendar to organize your time: add your classes, work schedule, planned study time, social events and anything else that will help you manage your time.
Tap the plus icon (+) at the top of the screen to add items to your calendar. The more details you can add for each calendar entry, the better.
Tap the square icon at the top of the screen to change the calendar view. Use "Week" to view your schedule for the whole week and use "Day" or "Agenda" to view calendar specifics for each day.
Access Your Calendar Without the Outlook App
Subscribe to your Outlook Calendar so that you can view your calendar in another app. You won’t be able to edit or add events to your calendar, but you will be able to quickly view your calendar in the app of your choice on iPad and your phone. Follow these instructions to subscribe to your Outlook calendar within the Calendar app on your iPad:
- Go to outlook.office.com with an internet browser such as Safari
- Type in your email (name.#@Buckeyemail.osu.edu) and then tap "Next"
- Sign in with your Ohio State credentials
- Authenticate with Duo
- Tap the gear icon at the top right part of the screen.
- In the search box, type “Publish”
- Select "Publish a Calendar" from the search results
- Under "Publish a Calendar," use the drop-down menus to select "Calendar" and "Can view titles and locations." Tap "Publish"
- Copy the entire URL
- Go to the Notes App and paste the link into a note
- Tap the link and then subscribe
Find more in-depth instructions about how to subscribe to a calendar on any device.
Send Meeting Invitations
To easily set aside time with others or for yourself, send a meeting invitation through Outlook. Anyone invited to the meeting will see it on their calendar, too.
- Tap to open the Outlook app on your iPad
- Tap the calendar icon in the bottom right corner of the menu
- Tap the blue plus icon in the bottom right corner of the screen
- Tap to add a title, invite people, adjust date and time, location and set up as a meeting within Microsoft Teams on the pop-up menu
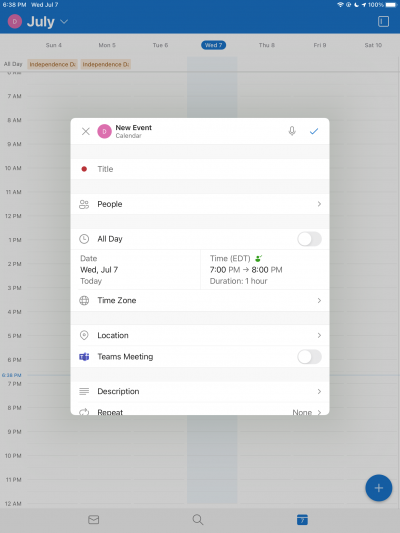
- Tap the check mark in the top right corner of the screen when you’re done editing the event


Accepting Meeting Invitations
If you’re added to a meeting invite through Outlook, it will be sent to your email. It will appear on your calendar with a Tentative status before you review it. Learn how to accept, tentatively accept and decline meeting invitations:
- Tap on the meeting invite in your inbox to open it
- Review the sender’s description and either tap accept, decline, or suggest a new time. If you tap decline, the event will not appear on your calendar.
Snooze Your Emails
Snoozing an email is a way to remind you of an email at a later time. The snoozed email is removed from your inbox and placed in a folder until the time you choose. When the time comes, the email returns to your inbox. Hopefully, it gets your attention about the email when you're ready to respond. Here's how to use Snooze:
- Tap on an email you want to Snooze
- Tap the ellipsis icon (…) near the top right corner of the email screen
- Tap "Snooze." The first time you Snooze an email you will need to either select a folder for your snoozed emails or let Outlook create a Snoozed folder for you
- Choose a time for the email to return to your inbox


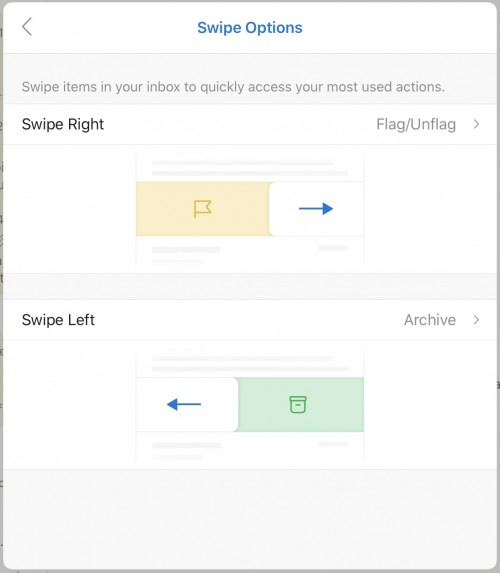
Quickly Organize Your Emails with Swiping
Often times, a barrier to checking email is the number of emails that end up in your inbox. Swiping in Outlook is one way to efficiently organize your inbox. Swipe to the left or right to delete, archive, flag/unflag, move to a folder or snooze email. Swipe settings are customizable. Here’s how to customize swipe settings in Outlook:
- Tap on your initials or avatar at the top left of the screen
- Tap the gear icon at the bottom left of the screen to open Settings
- Tap "Swipe Options" in the Mail section (you might need to scroll)
- Choose the two actions you would like to use when you swipe left or right. Select the caret to the right and then choose the action for that direction